'Winners do what they must; Losers do what they feel'
Welcome to the new and improved connection to my home office! Thanks, AT&T!

'Winners do what they must; Losers do what they feel'
Back when I was in the Navy, this was running around. Transcribed from
memory, so it may be off by a bit...
12 days of bootcamp
'Rumble Synth', a demo for the S.F.T. Synth project.
The bassline and lead parts were done with an early prototype of this (amazing!) device. You can also find the song
on my SoundClick page.
Rumble Synth
STREAM
'Mondo', a tribute to a friend of mine from High School named
Armando who wrote a campy/folky song that a bunch of us used to play, mostly
because that's what Danny wanted to do and the rest of us went along with it.
Well, this song was in serious need of jazzing up, and so I wrote something
that sort of reminds you of the original, then goes off in its own direction.
Mondo
STREAM
Pounding 'Geddy Lee' style bass (and somewhat-style vocals),
'what it says on the tin',
a song called 'Hikikomori', from the perspective of a Hikikomori. There's more about this on my
SoundClick site.
Hikikomori
STREAM
A somewhat recent 'in progress as usual' work is a JPop-style, currently a 'proof of concept'
version, but I think it could stand alone as-is.
JPop Concept #2 (mix 'a')
STREAM
This is another one of my songs, more of a 'smooth jazz'
genre - "Summer's Last Sunset"
SummersLastSunset.mp3
STREAM
Here's an anti-Ritalin 'Pink Floydish' work I did a few years ago:
WhyDoYouDrugTheChildren.mp3
STREAM
(RITALIN: Today's guarantee that tomorrow we will have plenty of garbage men,
hamburger flippers, and ditch diggers, if they can stay out of prison).
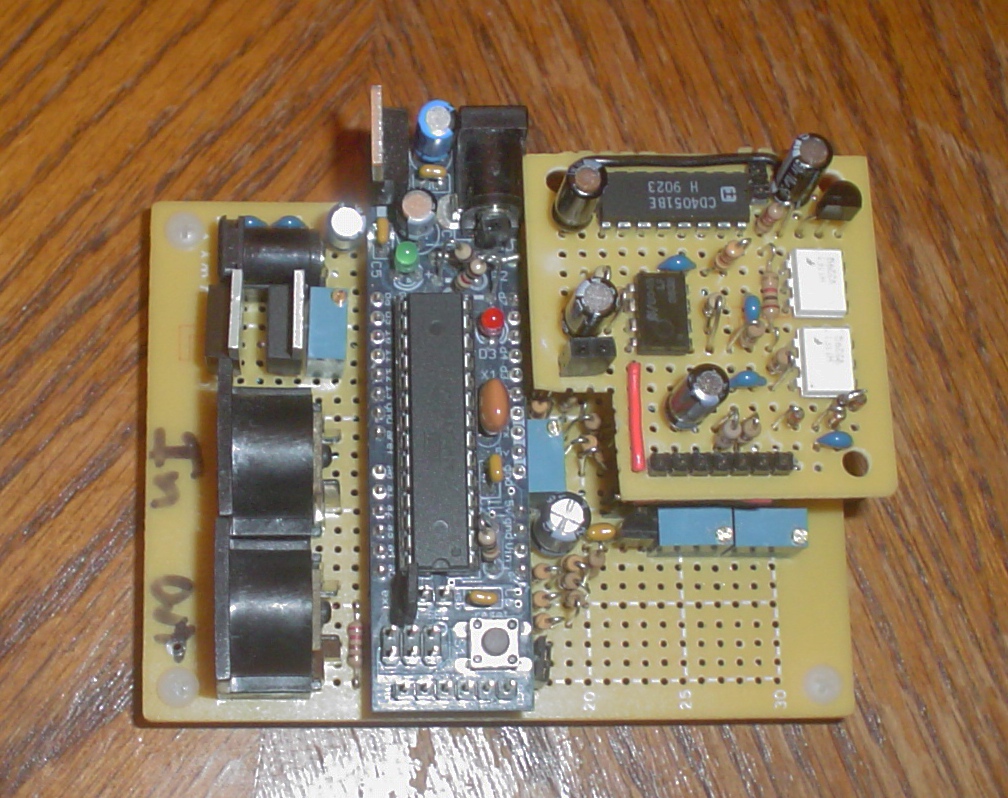
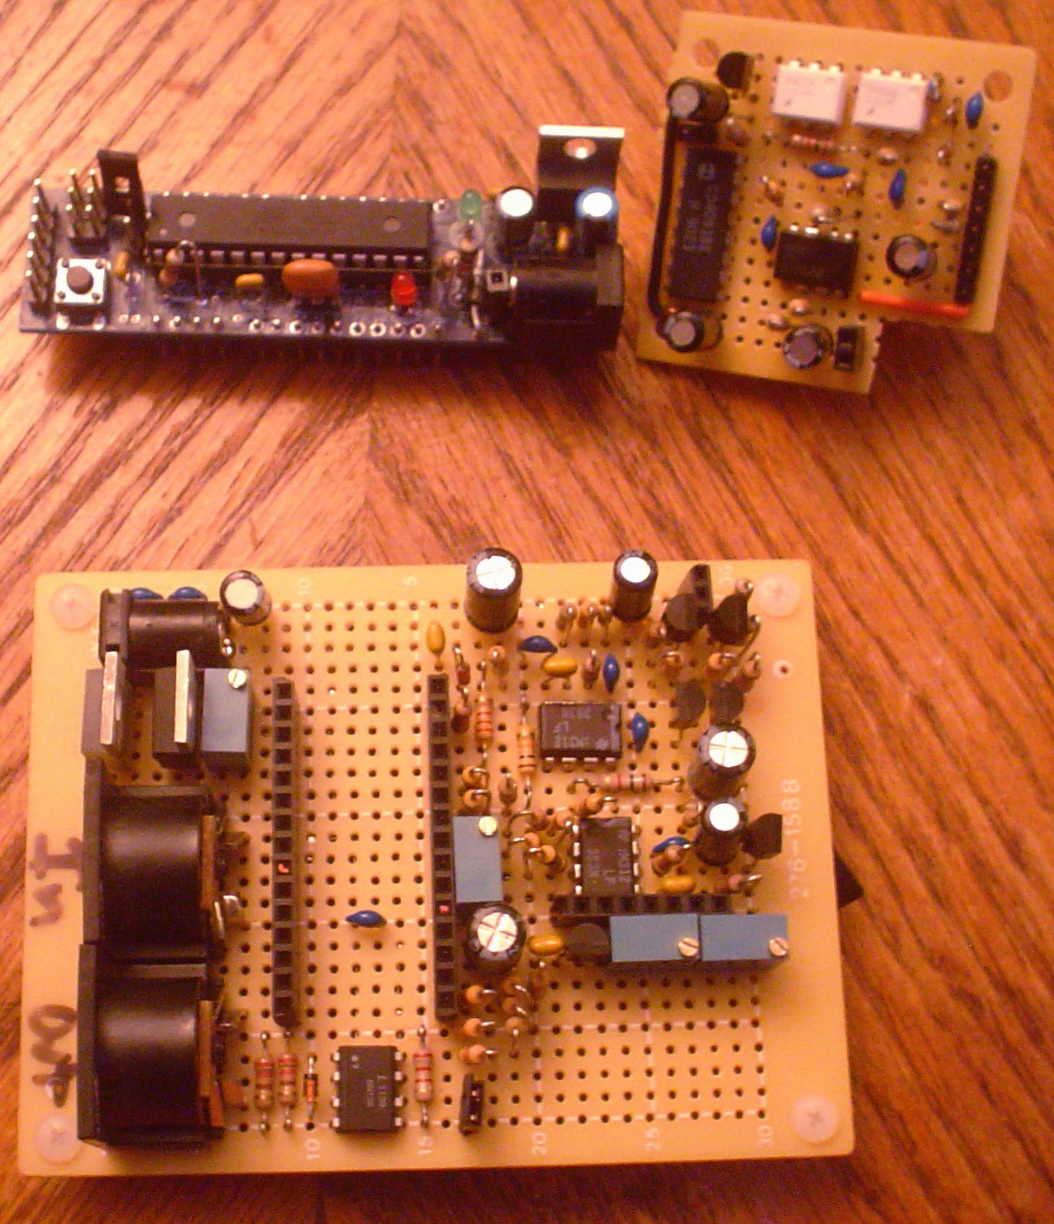
This is an old photo of the original prorotype for my monophonic synth project, the SFT Synth, code-name 'Piranha'. It uses an Arduino-compatible AVR microcontroller to function as a DCO and manage envelope and VCF control output, which then drives a VCA (on the board) and a VCF. The first photo is of the completed prototype, and the 2nd shows it broken apart into the 3 modules. The upper left module is a 'Boarduino' that I purchased as a kit from Adafruit. It is basically an Arduino clone with a simple serial interface that sells for under $20 and can plug into a breadboard.
The SFT Synth accepts MIDI input and includes MIDI output for status and feedback. I plan on adding other features, such as synchronization signals (both input and output). I designed and built this project for a few reasons, one of which is that I want to make money with a cool idea. I've ALSO been wanting a good quality monophonic synth for a VERY long time, and obtaining that "old school" monophonic sound almost REQUIRES inventing your own, or paying a hell of a lot of money for "something new".
As a 'proof of concept' demo, I did a 'synth bassline' AND 'portamento' lead for THIS (also in MP3 format). It's called "Rumble Synth". Enjoy. Also available HERE.
A 'plain' sample of what it sounds like (various patches) can be found here. I recorded it 'as-is', snipped a few sections I didn't want, and converted it to ogg format since [for some reason] mp3 format had too many artifacts. There is one place where I could here some compression artifacts, though. On a related note, I'm using 'stepped' waveforms to simulate triangle, sawtooth, and pulse, so maybe the audio compression algorithms choke on it? In any case, ONE of the patches uses a pseudo-random filter [you'll know it when you hear it], and of course there's a variable portamento setting, from 0 to 'pretty long'. One of the patches is supposed to sound like the lead part from Emerson Lake and Palmer's "Lucky Man", in case you thought it might be that. Another is supposed to sound like the 'Dr. Who' intro to Muse's "Uprising". The idea is to provide a sound that's comparable to the 'retro' analog synth sound that has been used by famous musicians in the past. I think I've succeeded.
I've spent over 3 months on this now, including over a month for the software alone. That includes both the control software AND the software for the Arduino-compatible board. What saddens me is some of the' regulatory requirements I'm going to have to deal with, particularly FCC Part 15 subpart B, which means forking over $$$$ to have it tested _AND_ certified 'cause it's a "peripheral device". I know it's important 'cause I don't want to interfere with radio and TV. I listen to AM all the time while I'm working with it, and my TV is never affected. But still... gotta pay someone to verify it, certify it, etc. and then wait 30+ days afterwards to get a certification from the FCC. Bleah. It REALLY puts a stumbling block in the way of 'the little guy' trying to get something cool 'out there'.
Still, in spite of all of this, I plan on making this commercially viable/available (both hardware and software), FYI, so hang onto your shorts until it's ready...
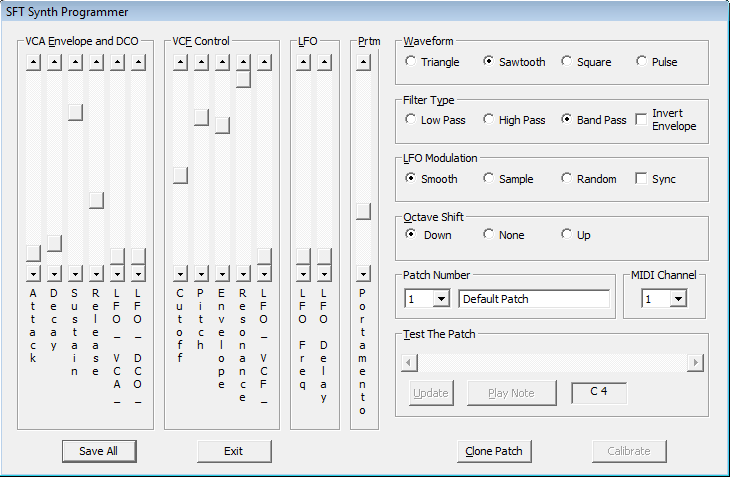
The above screenshot is a recent version of the 'SFT Synth Programmer' application, designed SPECIFICALLY for the SFT Synth project. It uses 'non-registered' midi control registers to store all of the parameters that you see, so it's following the MIDI spec, but doesn't require a registered MIDI vendor ID in order to function.
I plan on making it possible to use a 'keytar' to control patch selections and as many parameters as possible using the standard MIDI definitions. Unfortunately, a number of the parameters don't really have a STANDARD MIDI definition, so it DOES pose a bit of a problem. Fortunately, it's all fixable via software.
Something I'm rather proud of is the LARGE NUMBER OF VARIABLE PARAMETERS that you see on the screen, which is designed to emulate an actual panel. A future project will probably be "that panel" with MIDI output to "live program" the device, though it would be a bit pricey due to the large number of slide controls.
I estimate the cost for the unassembled unit to be much less than $100 (retail), including the main board and the 'Arduino clone' (or its equivalent), so long as I can get the boards made at a reasonably low price. I have intentionally NOT chosen any exotic, expensive, nor "not likely to be available in the future" or similarly hard to find component. All of the parts I have chosen are either ROHS compliant, or else ROHS compliant versions exist. None of the circuits have any kind of patent encumberance that I'm aware of (I searched online), and the basic design of the VCF was published in the mid-1970s in a magazine. A few of my own goodies have been added, though, and I may choose to 'patent encumber' them, but only to keep others from stepping on my design too much. (most likely there's nothing to patent, though, as it's all pretty "old school" stuff).
The SFT Synth Programmer application includes a 'calibrate' feature. This causes the device to generate test signals that you can use to adjust the 4 20-turn potentiometers. When I calibrated the unit the first time, it took me less than 15 minutes, but it wasn't working properly at the time so I suspect it wouldn't take so long now. One of the adjustments may go away in the future if I decide to re-design the VCA (it is a "zero" level adjust for volume cutoff). The other 3 adjustments are for the low, high, and mid-range frequency settings on the VCF. Since the VCF is exponential in nature, it was necessary to have a RELIABLE linear to exponential conversion (one that doesn't have any appreciable temperature drift). But it only uses about $3 (retail) worth of parts to do that, so it's no big deal. You DO have to calibrate it, though. It's still an ANALOG device, after all.
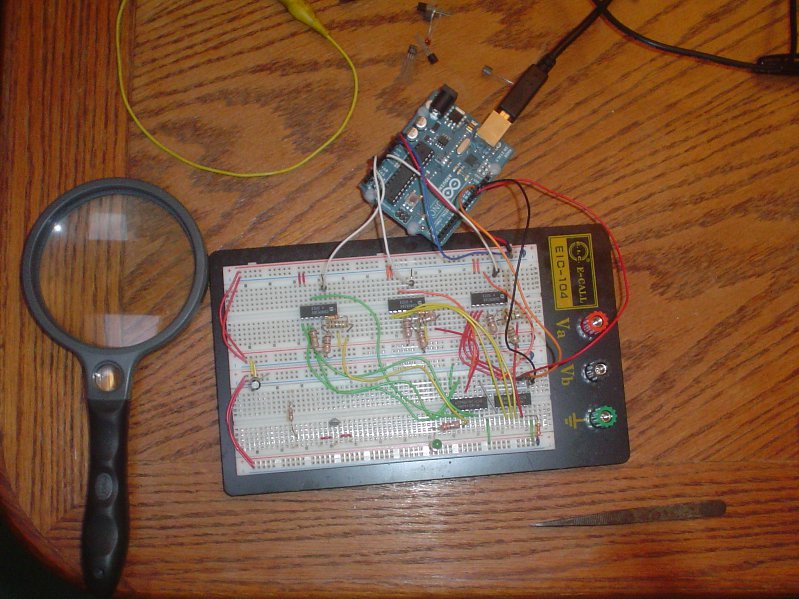
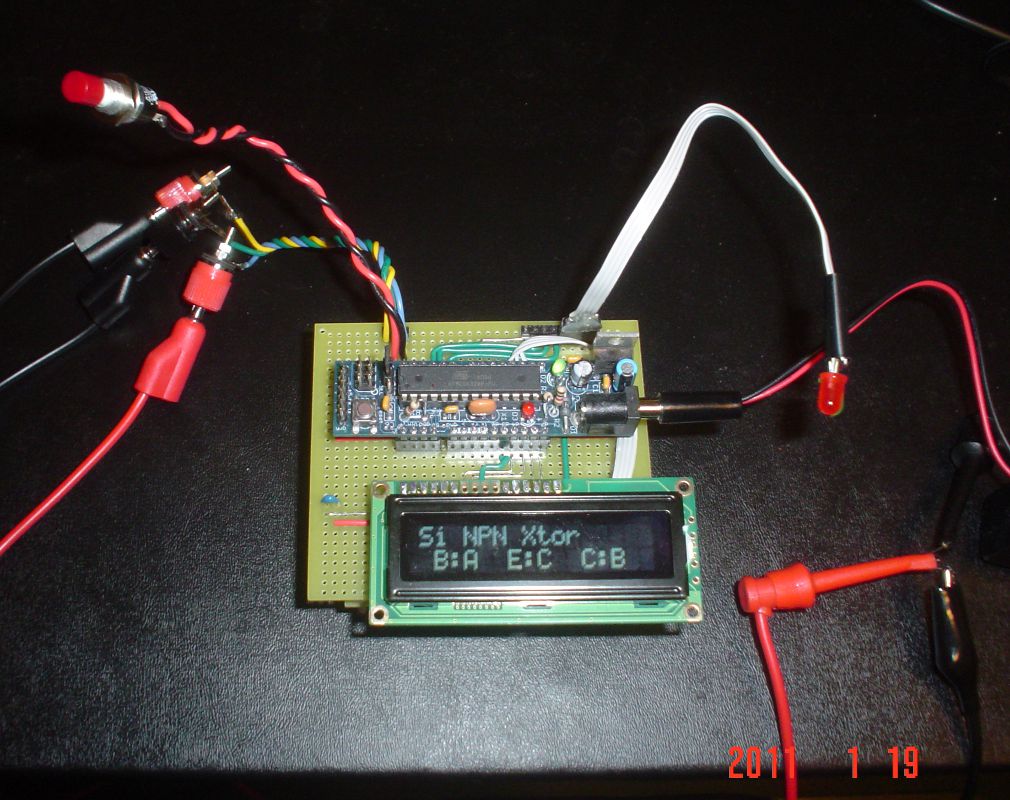
Here's a newer pic of the same project, complete with prototype circuit board and an 'integration board' above it with the microcontroller and an LCD display, and some test leads wired in so that the board can identify a particular component. Still lots of work to do to this guy before it's ready for prime time, calibration being the most difficult part. The analysis board is covered up, but rest assured it's what was being prototyped on the breadboard above.
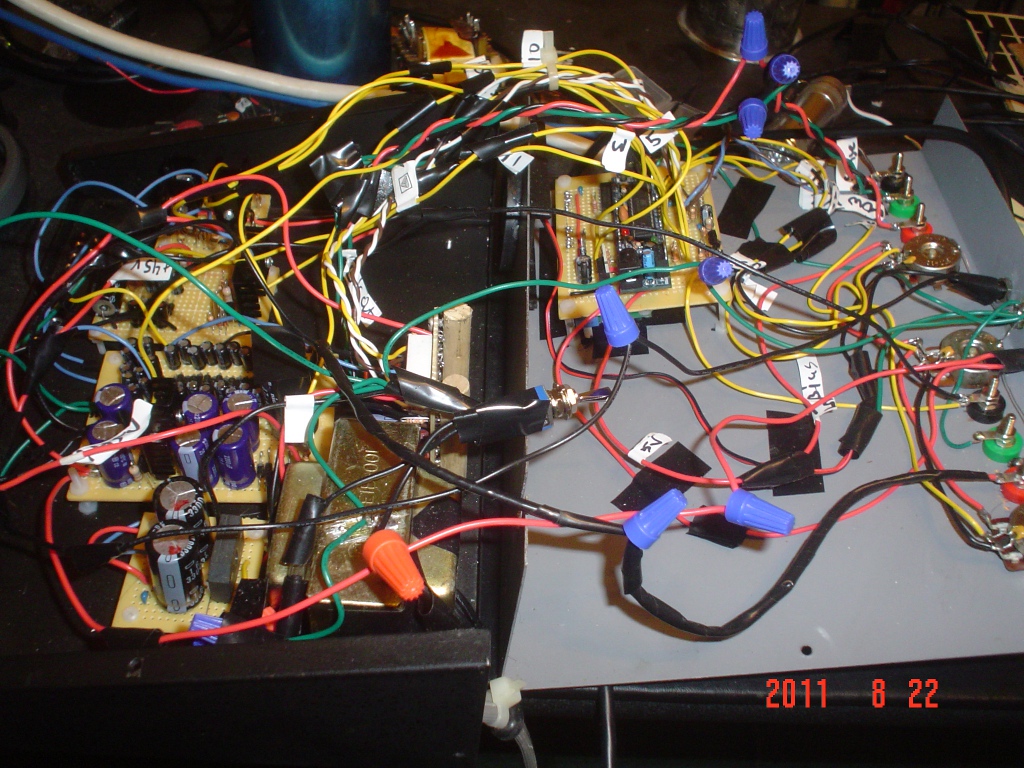
More fun below, a second project involving a microcontroller, a bunch of power transistors, a bunch of capacitors, a bunch of wires, and a bunch of other associated components. Drilling holes in the sheet metal case is probably the hardest part, but a Dremel tool, cutting oil, and lots of filing seem to be getting the job done 'on the cheap'. Investing in milling equipment and large scale drilling devices isn't in my budget, unfortunately.


This is one of those animated GIF thingies. I replaced the
'cheesy' one with something different. So, look into my eyes -
you're getting sleepy... sleepy... sleeeeepeeeeey....
For those who care, I used a microsoft application called
"Microsoft GIF Animator" to create it from a few VERY
simple bitmap files. This program is on the MSDN Level II CD #9,
entitled "other SDK's". I guess a GIF animator is an
'SDK'....
Unfortunately Microsoft isn't making this available any more,
but you can download a copy
HERE
This is an 'anaglyph' photo (anagraphic 3D) that I created using a
3D photo program I was working on (I intended it to be open source, and ported to
linux and BSD when I'm was done with it). By using a digital camera on a
tripod, and moving the camera to one side to take a second photo, then
some regular photo editing software, and finally my 3D photo app (to merge the
red + cyan right/left images properly), I was able to create the following
photo from some left/right images I took a while ago.
Use red/cyan 3D glasses to get the proper effect.
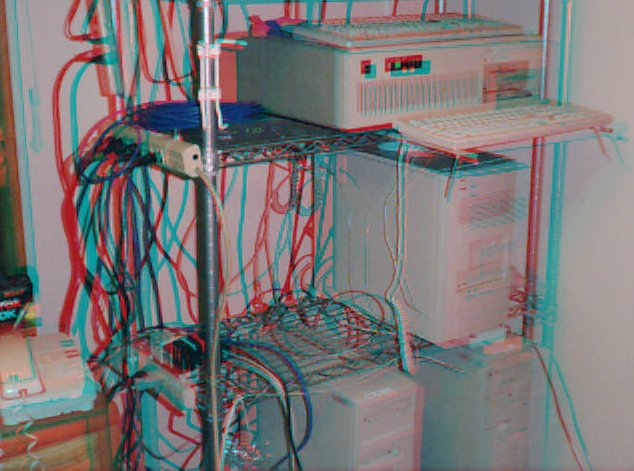
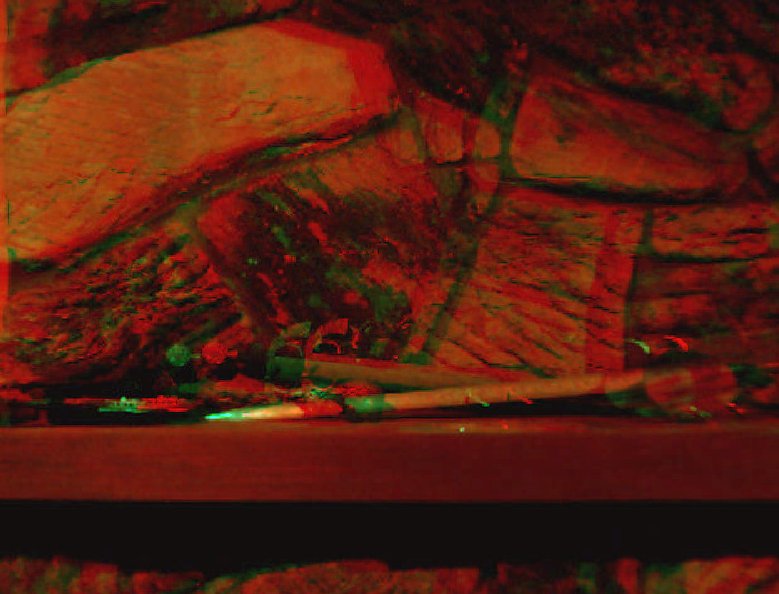
This next photo is based on my first attempt at 3D. After cleaning it up with
photo editing software and re-doing the 3D with the app I was working on,
I was able to get a pretty good rendering, except that the tint is a little
on the 'brown' side (due to the photos I used). The 3D 'rock formation'
and the fireplace mantle are pretty good for 3D, though.
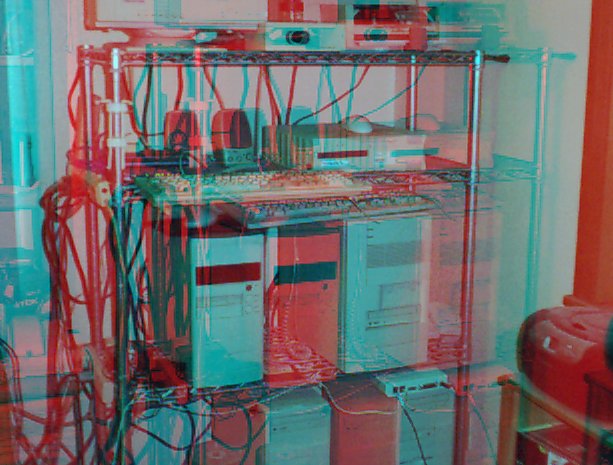
This is a more recent attempt at the first 3D photo. Note that it has better
perspective as well as more equipment on the rack. The problem with too much
separation, though, is that the edges of the screen become less well defined.
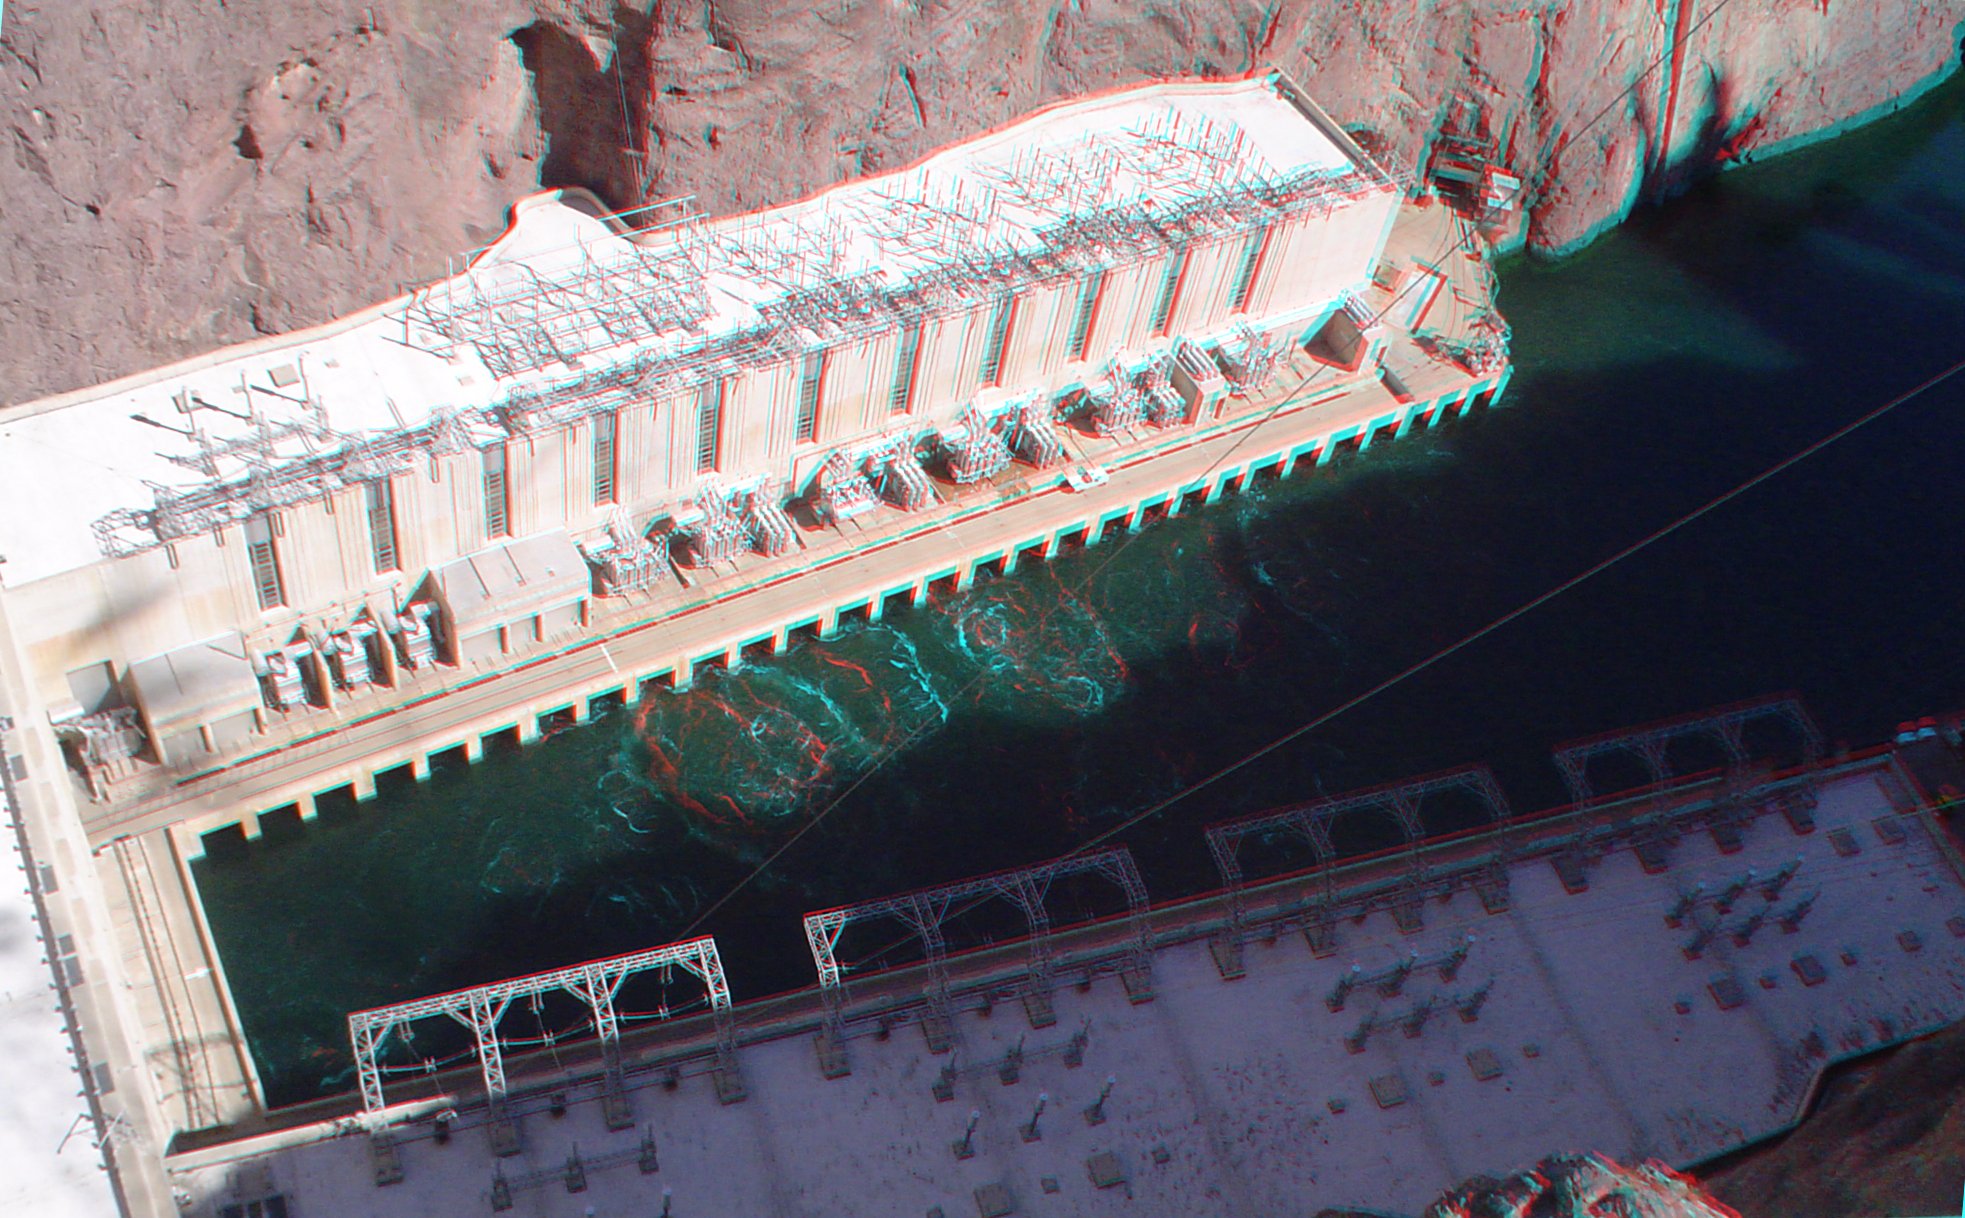
These next 2 photos are my most recent 3D attempts (from 2008). First, a photo of the
bottom of Hoover Dam. Since the left and right photos were taken a few seconds apart the
water isn't exactly right, but everything else looks correct. Also, I had to rotate
one of the photos to get them to line up properly, but GIMP does a good job of that
kind of thing.
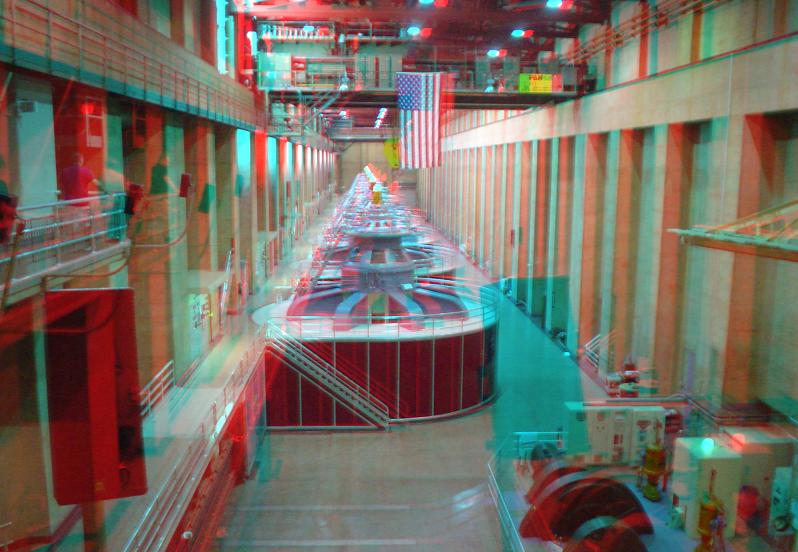
This next photo is of the inside of one of the Hoover Dam generator rooms (the Nevada
side). The 2 photos were imperfect, and taken several seconds apart, but I think the
overall 3D effect can still be well demonstrated here.




©2002-2021 by Big Bad Bob Frazier
Last Update: 12/09/2021

![]()
And don't forget OS-Tans - excessively cute mascots for your operating system.